In 2025, how to install Raspberry Pi OS (formerly known as Raspbian) on a Raspberry Pi development board?
Install Raspberry Pi OS
Download Raspberry Pi OS (64-bit) Lite from
Operating system images – Raspberry Pi
. Lite is designed to provide a minimal system environment, allowing users to install and configure software as needed. It has no graphical interface and can only be operated through the command line. If you are using a newer 64-bit Raspberry Pi device and need higher performance, it is recommended to choose the 64-bit version. If you need specific legacy software support or encounter compatibility issues, consider using the Legacy version.
You can try using BT download to improve the download speed. For example, first download a seed file https://downloads.raspberrypi.com/raspios_lite_arm64/images/raspios_lite_arm64-2024-11-19/2024-11-19-raspios-bookworm-arm64-lite.img.xz.torrent , and then use your BT download tool to open it.
Download Raspberry Pi Imager from Raspberry Pi OS – Raspberry Pi and install it. We will use this software to install the downloaded image onto the Raspberry Pi.
Open Raspberry Pi Imager, the interface is as follows.
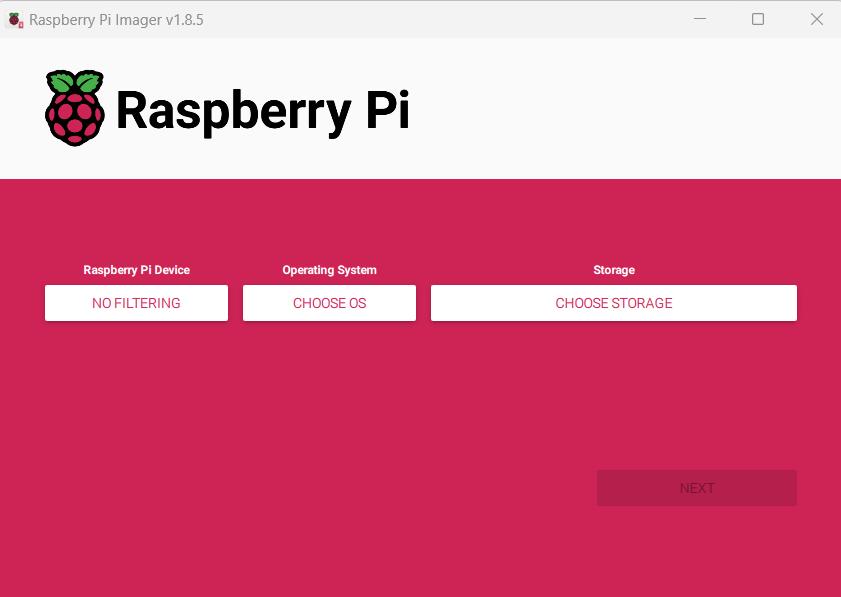
- The first button is to select the Raspberry Pi model
- The second button is to select the operating system to be burned
- The third button is to select the SD card (the operating system will be written to the selected device)
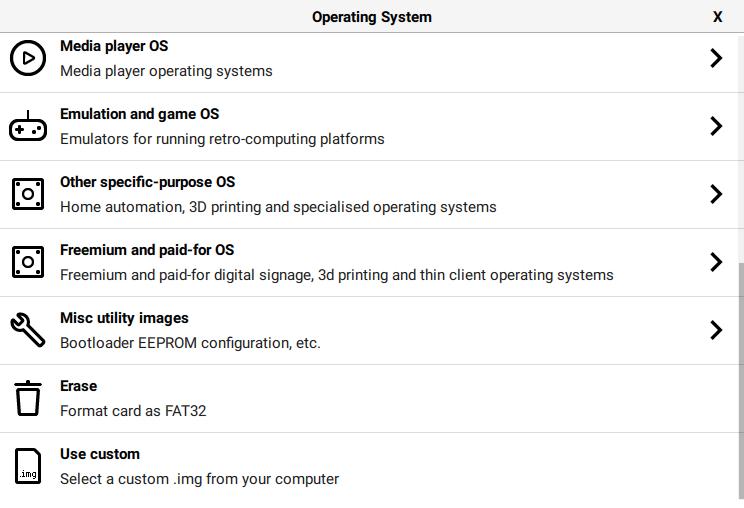
When selecting the operating system to be burned, because we have already downloaded the operating system image, click the Use custom button directly.
After that, Raspberry Pi Imager will ask whether to modify the configuration items. Please enter the modification interface at this time.
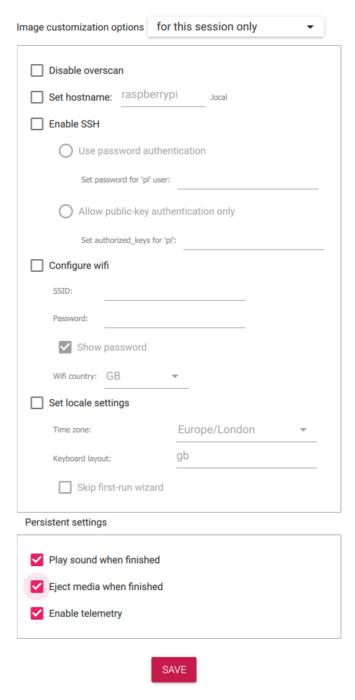
Please set the username and password. If you want to enable ssh, it is recommended to use public-key for verification.
Also, please modify other configuration items according to your needs.
There is an option in the third tab: Enable telemetry. What does it mean? If you check this option, it will send statistical reports to the Raspberry Pi website in order to display the relevant
statistics page
.
Continue, after the installation is complete, put the SD card into the Raspberry Pi and start it.
The first boot may require waiting for the system to initialize, please be patient.
Change software source
After the system is installed, first run the command
sudo apt update
If you find the download is too slow, you can change the software source in your area.
You can change the Debian and Raspberrypi software sources
Change Debian software source
Open Debian – Debian Mirrors (worldwide) , and select a mirror site near you. Run:
sudo nano /etc/apt/sources.list
Replace the original link with the link of the mirror site you selected, only replace the link part, and keep the content after the link unchanged.
You can open the mirror site to view the relevant instructions.
Lines starting with # are commented out and do not need to be taken care of.
Change Raspberrypi software source
Open Raspberry Pi OS Worldwide Mirror Sites List, and also select a mirror site near you. Then run:
sudo nano /etc/apt/sources.list.d/raspi.list
Similarly, replace the original link with the link of the mirror site you selected, only replace the link part, and keep the content after the link unchanged.
After changing the software source, run the command:
sudo apt update
NTFS Driver
Sometimes it may be necessary to connect some NTFS formatted external hard drives to the Raspberry Pi.
Many old tutorials recommend installing the ntfs-3g driver. Nowadays, AI assistants such as ChatGPT also say this, but in fact, the driver has long been out of repair.
The new operating system has pre-installed the NTFS3 driver, which exists in the form of a module. You can use the following command to confirm whether the system has pre-installed the NTFS3 driver.
modinfo ntfs3
References
Raspberry Pi OS - Official Documentation
Raspberry Pi Imager updated to v1.6 - Raspberry Pi
Other versions of this page
This article has multiple language versions.
These pages only support browsing, and you cannot post comments or messages, but provide more language options and shorter loading times:
ZH EN ZH-TW JA RU KO CS ES AR FR PT DE TR IT NL SV DA FI PL UK HE RO HU EL HR TH HI BN ID SW VI NO
This article is translated from Chinese (Simplified) to English by AI.